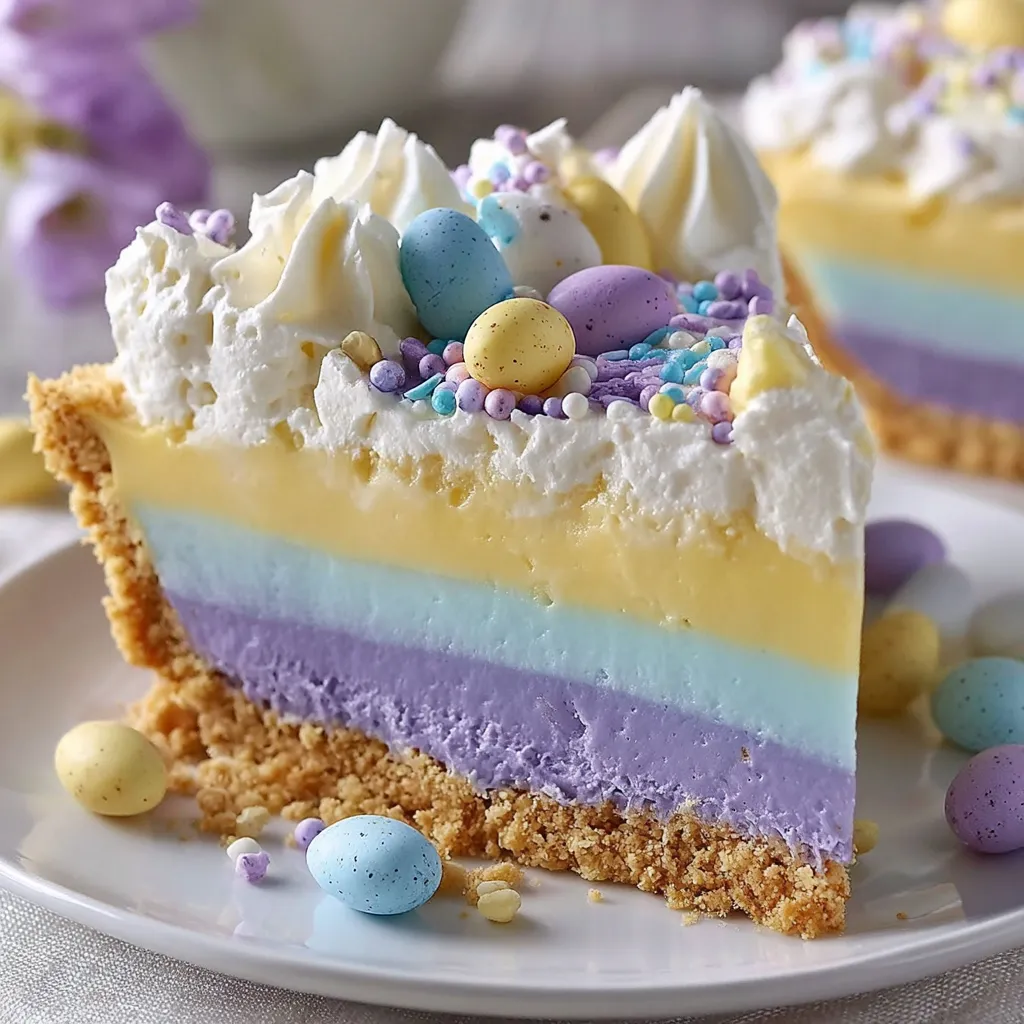
This Easter Jell-O Pie is a bright, festive dessert that’s just as fun to look at as it is to eat. With beautiful pastel layers of lemon, berry blue, and grape Jell-O blended with creamy cheesecake filling, every slice reveals a colorful surprise. The smooth, fluffy texture paired with a crunchy graham cracker crust makes it the perfect springtime treat. It’s easy to prepare, requires no baking, and is ideal for Easter gatherings, family dinners, or any occasion that calls for a cheerful dessert.
Ingredients
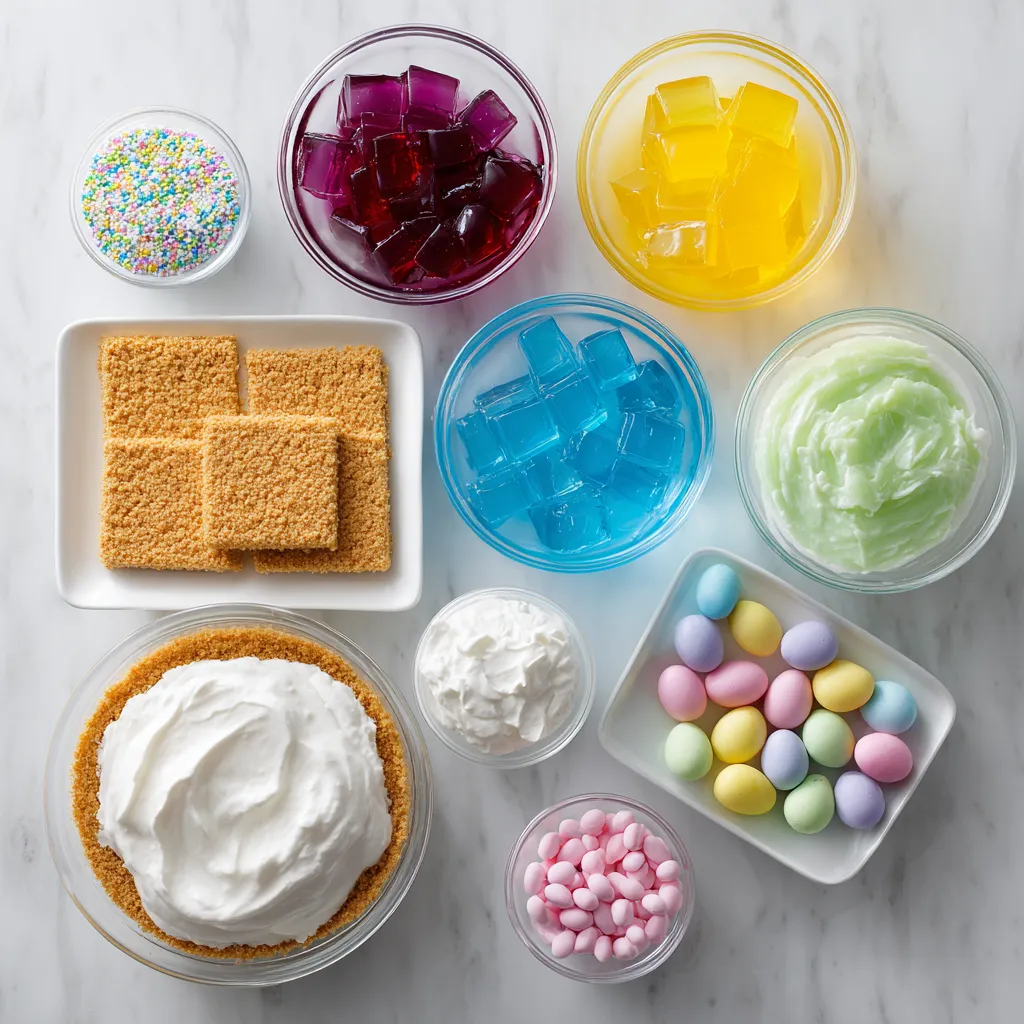
- 1 pre-made graham cracker crust
- 1 (3 oz) box lemon Jell-O
- 1 (3 oz) box grape Jell-O
- 1 (3 oz) box berry blue Jell-O
- 3 cups boiling water (1 cup per Jell-O flavor)
- 3 cups cold water (1 cup per Jell-O flavor)
- 8 oz cream cheese, softened
- 1 ½ cups whipped topping
- Whipped cream, pastel sprinkles, and candy eggs for decoration
Instructions
- Prepare the Lemon Layer
In a mixing bowl, dissolve the lemon Jell-O in 1 cup of boiling water, stirring until fully dissolved. Add 1 cup of cold water and mix well. Allow the mixture to cool slightly, then beat in ⅓ of the softened cream cheese and ½ cup whipped topping until smooth and creamy. Pour the mixture into the graham cracker crust and refrigerate for 30 minutes, or until the layer is partially set. - Prepare the Blue Layer
Dissolve the berry blue Jell-O in 1 cup boiling water, then add 1 cup cold water. Let it cool slightly before mixing in another ⅓ of the cream cheese and ½ cup whipped topping. Carefully spoon or pour the mixture over the chilled lemon layer. Return the pie to the refrigerator and chill for another 30 minutes. - Prepare the Grape Layer
Repeat the same process with the grape Jell-O using the remaining cream cheese and whipped topping. Gently pour the mixture over the blue layer and smooth the top. - Chill Until Set
Refrigerate the pie for at least 4 hours, or until the layers are fully set and firm. - Decorate and Serve
Before serving, decorate with whipped cream swirls, pastel sprinkles, and candy eggs for a festive Easter finish.
Variations
- Different Flavor Combinations
You can easily customize the colors and flavors by swapping the Jell-O varieties. Strawberry, lime, orange, or raspberry work beautifully and create a completely different color palette while maintaining the same creamy layered texture. - Make It Extra Creamy
For a richer texture, add an extra tablespoon or two of whipped topping into each layer. This makes the pie slightly fluffier and gives it more of a mousse-like consistency. - Mini Easter Jell-O Pies
Instead of one large pie, divide the mixture into mini graham cracker crusts or dessert cups. These individual servings are perfect for parties and make a cute addition to any Easter dessert table.
Cooking Notes
- Let Each Layer Cool Slightly
Make sure the Jell-O mixture cools slightly before adding the cream cheese and whipped topping. This prevents the dairy from melting and ensures a smooth, creamy mixture. - Allow Proper Chilling Time
Each layer needs enough time to partially set before the next one is added. Skipping this step can cause the colors to blend together instead of creating distinct layers. - Use Softened Cream Cheese
Softened cream cheese blends much more smoothly into the Jell-O mixture, preventing lumps and creating a silky filling.
Serving Suggestions
- Perfect Easter Dessert Centerpiece
Serve this pie as the centerpiece of your Easter dessert table. Its bright pastel layers and festive decorations make it visually stunning and ideal for holiday gatherings. - Pair with Fresh Fruit
A side of fresh strawberries, raspberries, or blueberries complements the sweetness of the pie and adds a refreshing contrast. - Serve Well Chilled
For the best texture and flavor, keep the pie chilled until just before serving. This keeps the layers firm and gives each slice clean, beautiful lines.
Tips
- Pour Layers Over a Spoon
When adding each new layer, pour the mixture slowly over the back of a spoon. This gentle method helps prevent the layers from breaking or mixing together. - Use Clear Mixing Bowls
Working with clear bowls makes it easier to monitor the consistency and cooling of each Jell-O layer before assembling the pie. - Chill Overnight for Best Results
Although 4 hours is enough time for the pie to set, chilling it overnight allows the flavors to meld together and creates the cleanest slices.
Prep Time
- Prep Time: 15 minutes
- Cook Time: 0 minutes
- Total Time: 4 hours 45 minutes
Nutritional Information (Per Slice)
- Calories: 250
- Protein: 3 g
- Sodium: 220 mg
Frequently Asked Questions
- Can I make this pie ahead of time?
Yes! This pie is perfect for making a day in advance. Simply keep it refrigerated and decorate just before serving. - Can I use homemade whipped cream instead of whipped topping?
Absolutely. Stabilized homemade whipped cream works well and adds a fresh, rich flavor. - How do I get clean slices?
Use a sharp knife dipped in warm water and wipe it clean between each cut to maintain neat layers. - Can I freeze this pie?
Freezing isn’t recommended because the gelatin texture can change after thawing. It’s best enjoyed fresh from the refrigerator.
Conclusion
This Easter Jell-O Pie is a cheerful, no-bake dessert that brings color and sweetness to any spring celebration. With its creamy layers, refreshing fruity flavors, and festive decorations, it’s guaranteed to be a crowd-pleaser. Easy to prepare and fun to customize, this pie is a wonderful way to add a playful touch to your Easter table.
Print
Easter Jell-O Pie
- Total Time: 4 hours 45 minutes
- Yield: 8 slices 1x
- Diet: Vegetarian
Description
This Easter Jell-O Pie is a bright, festive dessert that’s just as fun to look at as it is to eat. With beautiful pastel layers of lemon, berry blue, and grape Jell-O blended with creamy cheesecake filling, every slice reveals a colorful surprise. The smooth, fluffy texture paired with a crunchy graham cracker crust makes it the perfect springtime treat. It’s easy to prepare, requires no baking, and is ideal for Easter gatherings, family dinners, or any occasion that calls for a cheerful dessert.
Ingredients
- 1 pre-made graham cracker crust
- 1 (3 oz) box lemon Jell-O
- 1 (3 oz) box grape Jell-O
- 1 (3 oz) box berry blue Jell-O
- 3 cups boiling water (1 cup per Jell-O flavor)
- 3 cups cold water (1 cup per Jell-O flavor)
- 8 oz cream cheese, softened
- 1 ½ cups whipped topping
- Whipped cream, pastel sprinkles, and candy eggs for decoration
Instructions
- Prepare the Lemon Layer
In a mixing bowl, dissolve the lemon Jell-O in 1 cup of boiling water, stirring until fully dissolved. Add 1 cup of cold water and mix well. Allow the mixture to cool slightly, then beat in ⅓ of the softened cream cheese and ½ cup whipped topping until smooth and creamy. Pour the mixture into the graham cracker crust and refrigerate for 30 minutes, or until the layer is partially set. - Prepare the Blue Layer
Dissolve the berry blue Jell-O in 1 cup boiling water, then add 1 cup cold water. Let it cool slightly before mixing in another ⅓ of the cream cheese and ½ cup whipped topping. Carefully spoon or pour the mixture over the chilled lemon layer. Return the pie to the refrigerator and chill for another 30 minutes. - Prepare the Grape Layer
Repeat the same process with the grape Jell-O using the remaining cream cheese and whipped topping. Gently pour the mixture over the blue layer and smooth the top. - Chill Until Set
Refrigerate the pie for at least 4 hours, or until the layers are fully set and firm. - Decorate and Serve
Before serving, decorate with whipped cream swirls, pastel sprinkles, and candy eggs for a festive Easter finish.
Notes
- Let Each Layer Cool Slightly
Make sure the Jell-O mixture cools slightly before adding the cream cheese and whipped topping. This prevents the dairy from melting and ensures a smooth, creamy mixture. - Allow Proper Chilling Time
Each layer needs enough time to partially set before the next one is added. Skipping this step can cause the colors to blend together instead of creating distinct layers. - Use Softened Cream Cheese
Softened cream cheese blends much more smoothly into the Jell-O mixture, preventing lumps and creating a silky filling.
- Prep Time: 15 minutes
- Cook Time: 0 minutes
- Category: Dessert
- Method: No-Bake
- Cuisine: American
Nutrition
- Serving Size: 1 slice
- Calories: 250
- Sugar: 26 g
- Sodium: 220 mg
- Fat: 10 g
- Saturated Fat: 6 g
- Unsaturated Fat: 3 g
- Trans Fat: 0 g
- Carbohydrates: 36 g
- Fiber: 1 g
- Protein: 3 g
- Cholesterol: 25 mg
Keywords: Easter dessert, Jell-O pie, layered dessert, no-bake pie, spring dessert, Easter pie