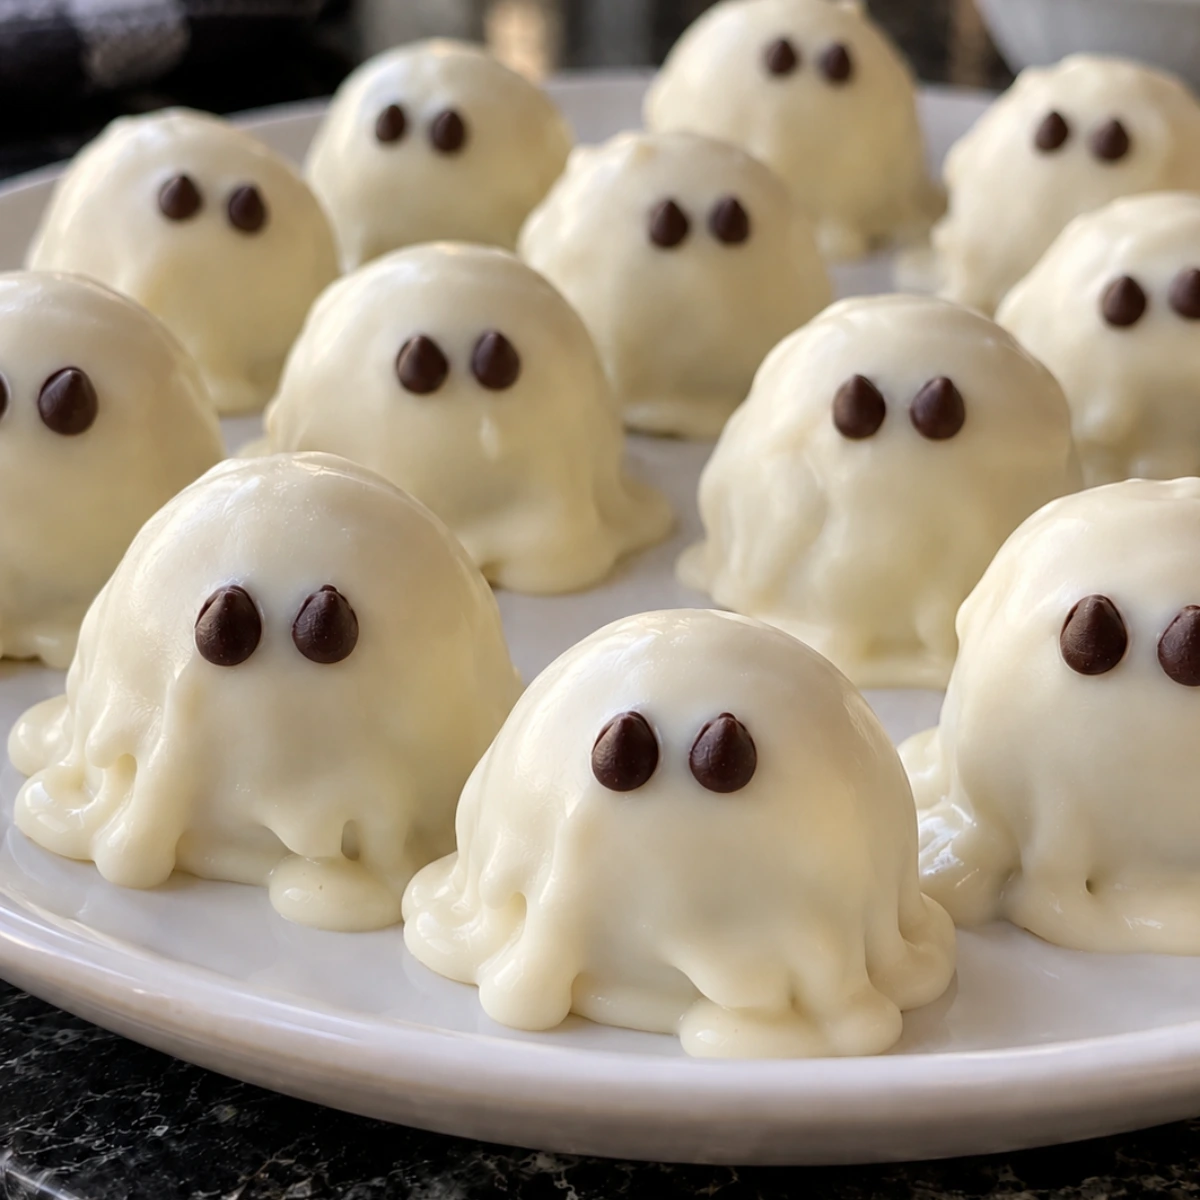
These adorable little ghosts are bringing more sweetness than scares! With rich, creamy Oreo centers, a smooth white chocolate coating, and tiny chocolate chip eyes, they’re a spooky-cute addition to your Halloween dessert table.
You only need 4 simple ingredients and no oven to make them. Perfect for Halloween parties, movie nights, or an afternoon of decorating with the family, these Oreo ghosts are just as fun to create as they are to eat!
Ingredients
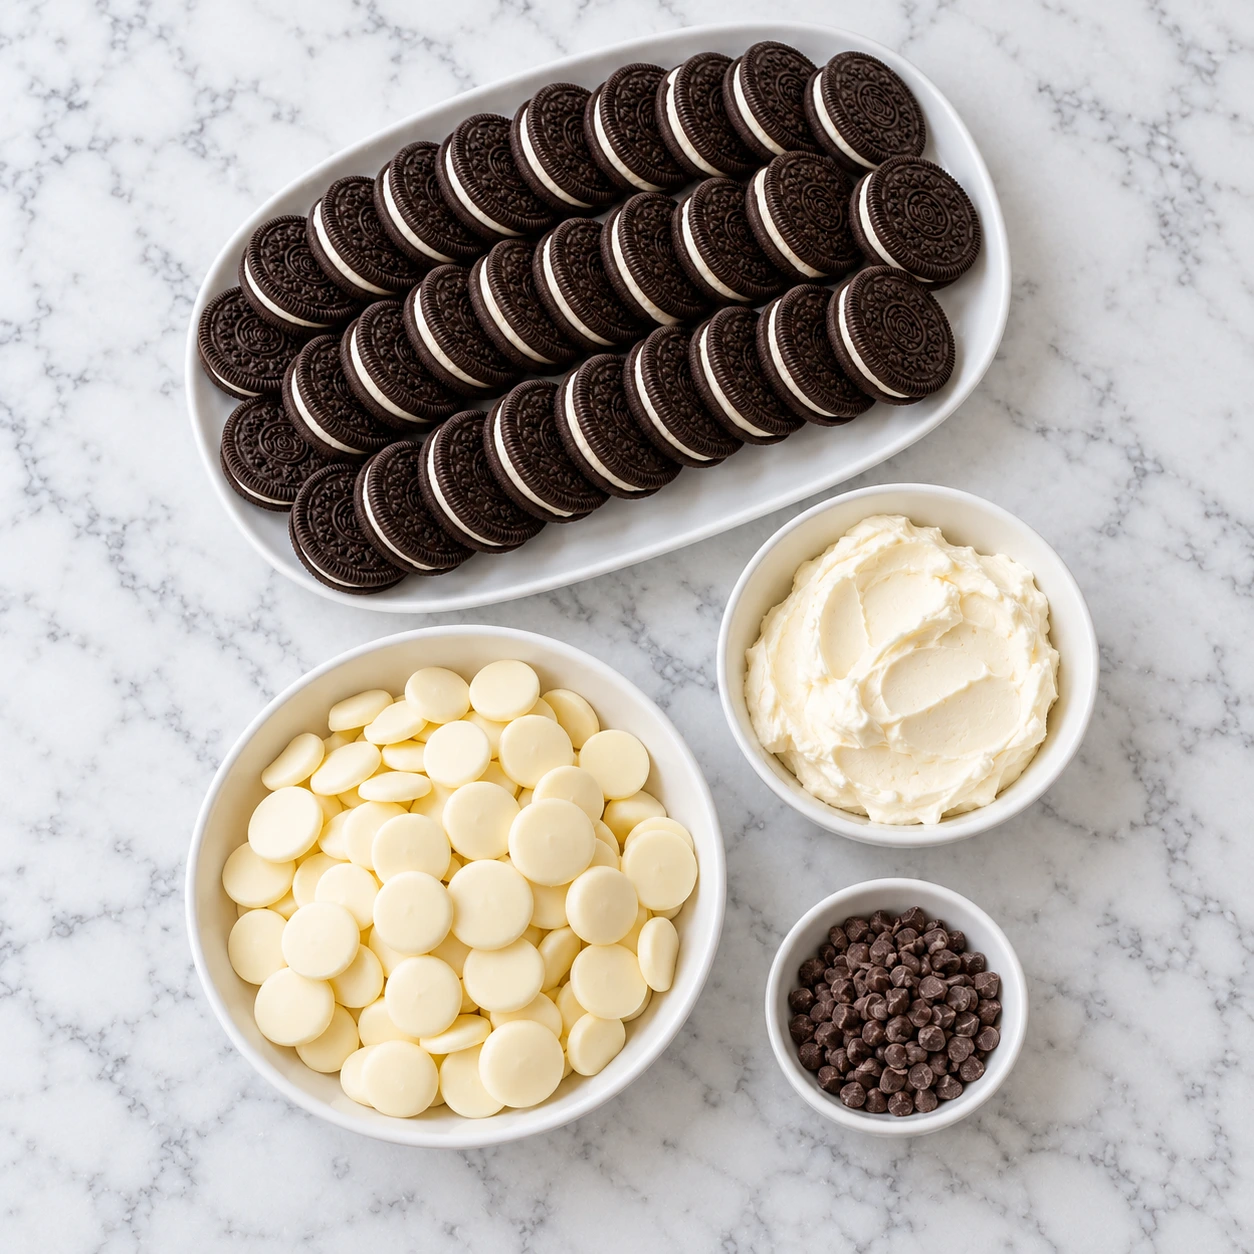
- 36 regular Oreo cookies, approximately 14.3 oz (405 g), including the cream filling
- 8 oz (225 g) cream cheese, softened
- 16 oz (450 g) white melting chocolate or white candy melts
- 48 mini chocolate chips, for decorating 24 ghosts; keep a few extras handy
Yield: Approximately 24 ghost balls.
Instructions
- Crush the Oreos
Place the whole Oreo cookies, including their cream filling, in a food processor. Pulse until finely crushed. No food processor? Seal the cookies in a zip-top bag and crush them thoroughly with a rolling pin. - Make the creamy filling
Combine the Oreo crumbs and softened cream cheese in a mixing bowl. Mix until you have a thick, evenly blended dough with no visible streaks of cream cheese. - Shape your little ghosts
Divide the mixture into 24 portions, approximately 26 g each. Roll each portion into a ball, then gently shape it into a short dome with a rounded top and flat bottom. Arrange on a parchment-lined tray. - Chill until firm
Refrigerate for 30 minutes, or until firm enough to dip without losing their shape. If the mixture still feels soft, give it a little more chilling time. - Melt the white chocolate
Place the melting chocolate or candy melts in a dry, microwave-safe bowl. Heat in 20-second intervals, stirring well between each, until smooth. Follow the package instructions if they specify a different melting method. - Give the ghosts their white coats
Lower each chilled Oreo dome into the melted coating using a fork. Lift it out, gently tap off the excess, and slide it onto the parchment. Spoon a little extra coating over the sides and around the base to create a flowing ghost-sheet effect. - Add their spooky eyes
Before the coating sets, gently press two mini chocolate chips into the front of each ghost, with the flat bases facing outward. Decorate one ghost at a time so the coating stays soft enough for the eyes to stick. - Let them set and enjoy!
Refrigerate for another 15 minutes, or until the coating is completely firm. Carefully lift the ghosts from the parchment and arrange them on your serving plate.
Variation
- Golden Oreo Ghosts: Swap the classic Oreos for the same weight of Golden Oreos. You’ll get a sweet vanilla-cookie center with the same creamy texture and adorable ghostly appearance.
- Mint Oreo Ghosts: Use mint-flavored chocolate sandwich cookies for a cool, chocolatey twist. If the cookies contain more filling than regular Oreos, start with slightly less cream cheese and add more only until the mixture holds together.
- Colorful Halloween Ghosts: Replace some of the white candy melts with orange, purple, or green candy melts. Keep a few ghosts white and mix in the colorful ones for a playful Halloween platter. This variation adds ingredients beyond the basic four.
Cooking Notes
1- No oven needed: These treats require only brief microwave heating to melt the coating. Chilling is essential, so allow enough time for both the Oreo centers and finished ghosts to firm up.
2- Use regular sandwich cookies: The ingredient ratio is designed for regular Oreos with their filling included. Double-stuffed cookies can make the mixture softer and may require less cream cheese.
3- Melt gently: White chocolate and candy melts can overheat quickly. Stir between short heating intervals, and stop heating as soon as the remaining small pieces melt into the warm coating.
4- Keep moisture away: Make sure your bowl and utensils are completely dry. Even a small splash of water can cause melted chocolate to become thick and grainy.
Serving Suggestions
- Create a spooky dessert platter: Arrange the ghosts on a dark serving plate so their white coating stands out. Add a scattering of crushed Oreo crumbs around them for an easy “haunted ground” effect.
- Serve in mini cupcake liners: Place each ghost in its own paper liner once the coating is firm. Halloween-themed liners make them easy to pick up and help keep your serving tray neat.
- Pair with a cozy drink: Serve these sweet little bites alongside coffee, tea, or warm milk for a Halloween movie night. Their rich filling makes one ghost a satisfying little treat!
Tips
- Use softened, full-fat block cream cheese: It blends smoothly into the crumbs and creates a firm, creamy filling after chilling. Spreadable cream cheese from a tub can make the mixture softer.
- Crush the cookies finely: Large cookie pieces make shaping and dipping more difficult. Fine, even crumbs give your ghosts smoother sides and help the filling hold together.
- Keep the portions consistent: Divide the mixture into 24 pieces before shaping. Similar-sized ghosts chill evenly, look tidy on a platter, and make portion estimates more reliable.
- Dip in small batches: Leave most of the shaped ghosts in the refrigerator while coating a few at a time. Cold centers are easier to handle and less likely to crumble into the melted chocolate.
- Let hot coating cool slightly: The melted coating should be fluid but not piping hot. Very hot chocolate can soften the filling and make dipping messy.
- Make them ahead: Prepare the ghosts the day before your celebration and refrigerate them in an airtight container. If stacking is necessary, separate the layers with parchment after the coating has fully set.
Prep Time
- Prep Time: 25 minutes
- Cook Time: 0 minutes; no baking required
- Chill Time: Approximately 45 minutes
- Total Time: Approximately 1 hour 10 minutes
Nutritional Information (Per Ghost)
- Calories: Approximately 210 kcal
- Protein: Approximately 3 g
- Sodium: Approximately 125 mg
Estimates are based on 24 ghosts, white chocolate, and two mini chocolate chip eyes per ghost. Actual values vary with ingredient brands, portion size, and the amount of coating used.
Frequently Asked Questions
1- Can I make Ghost Oreo Balls ahead of time?
Yes! They’re a great make-ahead Halloween treat. Prepare them the day before serving and store them in an airtight container in the refrigerator. Keep refrigerated and enjoy within 5 days.
2- Can I use white chocolate chips instead of candy melts?
Yes, but white chocolate chips may melt more thickly and can be harder to use for dipping. White melting wafers or candy melts are usually easier for a smooth coating. Always melt gently and follow the package directions.
3- Why is my Oreo mixture too soft to shape?
The cream cheese may be very warm, or the cookies may contain extra filling. Refrigerate the mixture for 15–20 minutes, then try again. For the most consistent results, use regular Oreos and block cream cheese in the listed amounts.
4- How do I make them look like ghosts instead of round truffles?
Shape the filling into short domes with flat bottoms before chilling. After dipping, spoon a little extra coating down the sides and around the base to form uneven, flowing edges. Add two tiny eyes near the top to bring each little ghost to life!
Conclusion
These Ghost Oreo Balls are almost too cute to eat! With creamy cookie centers, sweet white chocolate coats, and tiny spooky eyes, they turn four simple ingredients into a Halloween treat full of personality.
Print
Ghost Oreo Balls
- Total Time: 1 hour 10 minutes
- Yield: 24 ghost balls 1x
- Diet: Vegetarian
Description
These adorable little ghosts are bringing more sweetness than scares! With rich, creamy Oreo centers, a smooth white chocolate coating, and tiny chocolate chip eyes, they’re a spooky-cute addition to your Halloween dessert table.
Ingredients
- 36 regular Oreo cookies, approximately 14.3 oz (405 g), including the cream filling
- 8 oz (225 g) cream cheese, softened
- 16 oz (450 g) white melting chocolate or white candy melts
- 48 mini chocolate chips, for decorating 24 ghosts; keep a few extras handy
Instructions
- Crush the Oreos
Place the whole Oreo cookies, including their cream filling, in a food processor. Pulse until finely crushed. No food processor? Seal the cookies in a zip-top bag and crush them thoroughly with a rolling pin. - Make the creamy filling
Combine the Oreo crumbs and softened cream cheese in a mixing bowl. Mix until you have a thick, evenly blended dough with no visible streaks of cream cheese. - Shape your little ghosts
Divide the mixture into 24 portions, approximately 26 g each. Roll each portion into a ball, then gently shape it into a short dome with a rounded top and flat bottom. Arrange on a parchment-lined tray. - Chill until firm
Refrigerate for 30 minutes, or until firm enough to dip without losing their shape. If the mixture still feels soft, give it a little more chilling time. - Melt the white chocolate
Place the melting chocolate or candy melts in a dry, microwave-safe bowl. Heat in 20-second intervals, stirring well between each, until smooth. Follow the package instructions if they specify a different melting method. - Give the ghosts their white coats
Lower each chilled Oreo dome into the melted coating using a fork. Lift it out, gently tap off the excess, and slide it onto the parchment. Spoon a little extra coating over the sides and around the base to create a flowing ghost-sheet effect. - Add their spooky eyes
Before the coating sets, gently press two mini chocolate chips into the front of each ghost, with the flat bases facing outward. Decorate one ghost at a time so the coating stays soft enough for the eyes to stick. - Let them set and enjoy!
Refrigerate for another 15 minutes, or until the coating is completely firm. Carefully lift the ghosts from the parchment and arrange them on your serving plate.
Notes
- No oven needed: These treats require only brief microwave heating to melt the coating. Chilling is essential, so allow enough time for both the Oreo centers and finished ghosts to firm up.
- Use regular sandwich cookies: The ingredient ratio is designed for regular Oreos with their filling included. Double-stuffed cookies can make the mixture softer and may require less cream cheese.
- Melt gently: White chocolate and candy melts can overheat quickly. Stir between short heating intervals, and stop heating as soon as the remaining small pieces melt into the warm coating.
- Keep moisture away: Make sure your bowl and utensils are completely dry. Even a small splash of water can cause melted chocolate to become thick and grainy.
- Prep Time: 25 minutes
- Cook Time: 0 minutes
- Category: Dessert
- Method: No-Bake
- Cuisine: American
Nutrition
- Serving Size: 1 ghost ball
- Calories: 210 kcal
- Sugar: 21 g
- Sodium: 125 mg
- Fat: 12 g
- Saturated Fat: 6 g
- Unsaturated Fat: 6 g
- Trans Fat: 0 g
- Carbohydrates: 25 g
- Fiber: 0.5 g
- Protein: 3 g
- Cholesterol: 15 mg
Keywords: ghost Oreo balls, Halloween treats, Oreo truffles, no-bake Halloween dessert, 4-ingredient dessert, white chocolate Oreo balls